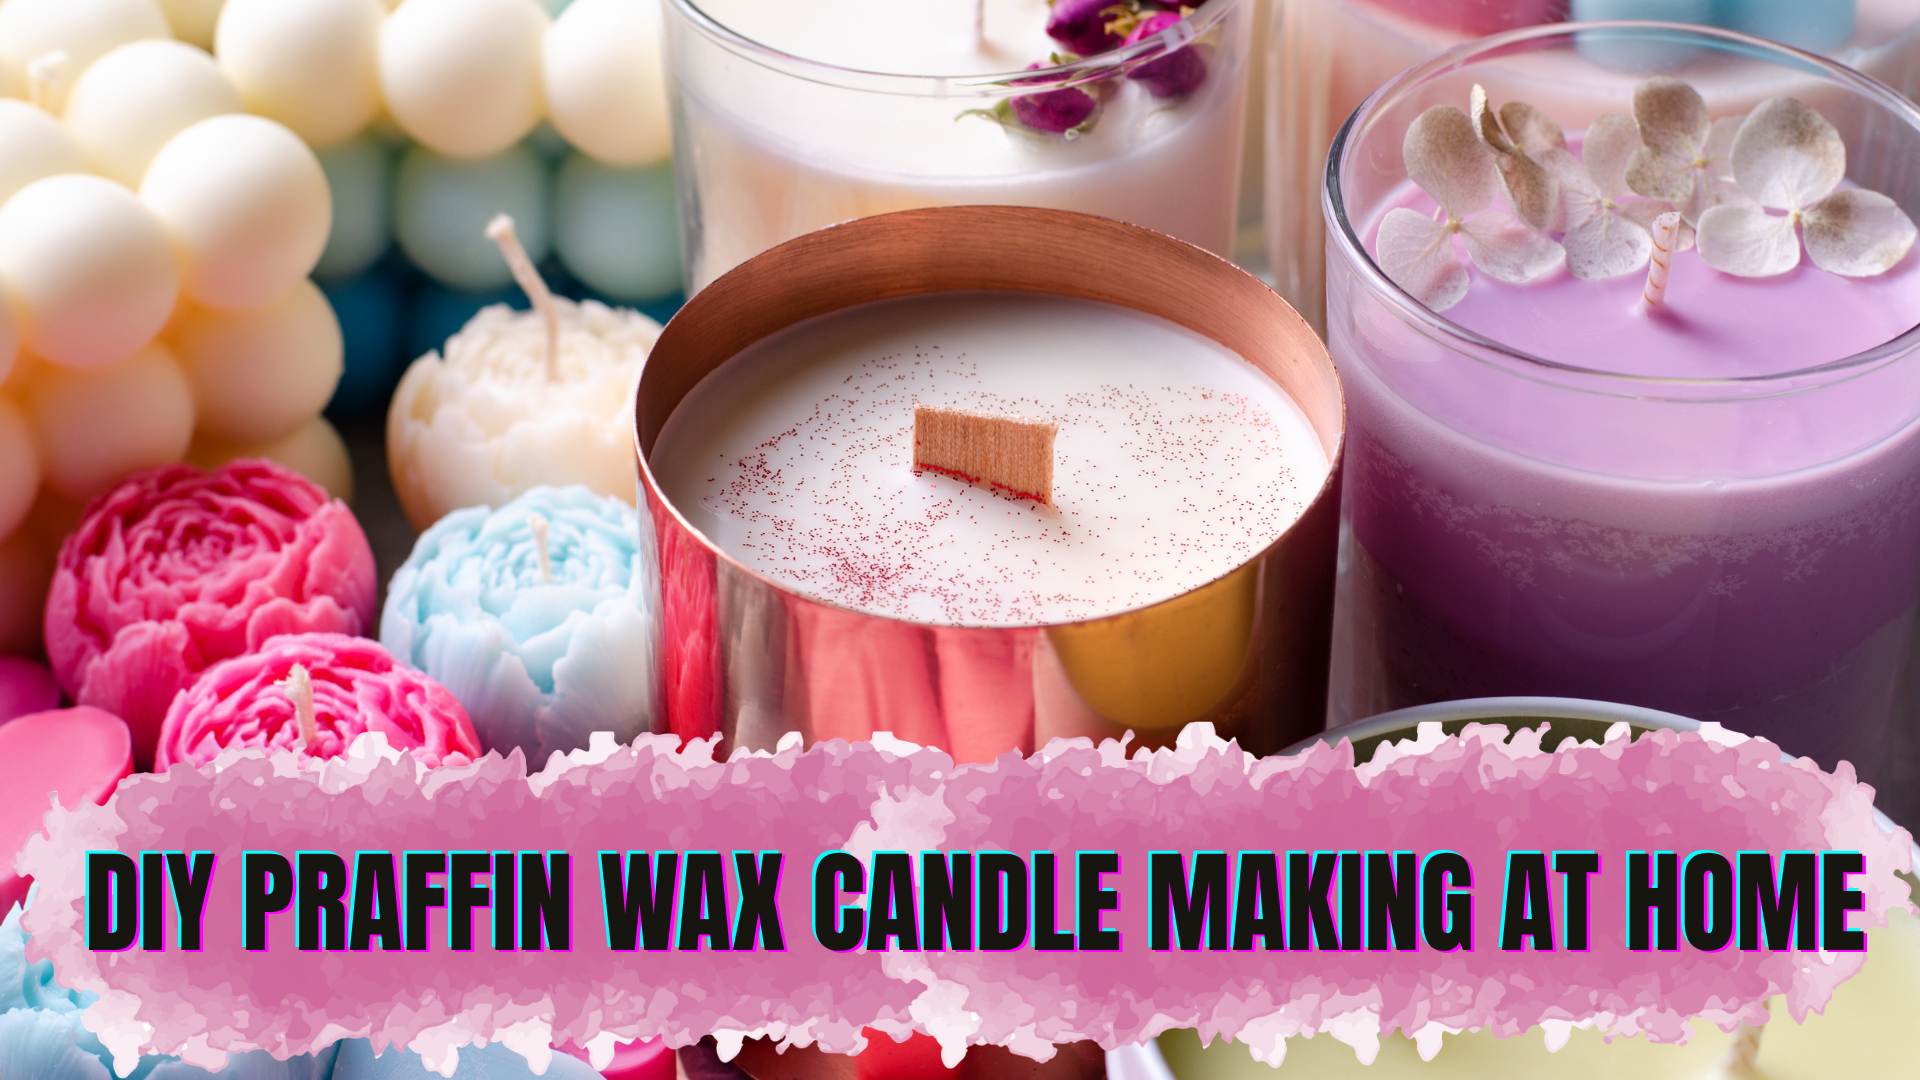
Candle making is one of the easiest and most enjoyable DIY activities you can try at home. It is creative, practical, and can even become a small business idea over time. Among different types of wax used in candle making, paraffin wax remains one of the most common choices, especially for beginners.
If you have been searching for a simple guide on how to make a candle with paraffin wax, this article will help you understand the full process in easy language. From materials to safety tips, everything is explained step by step so that even a first-time candle maker can follow it without confusion.
Table of Contents
What Is Paraffin Wax?
Paraffin wax is a soft, colorless wax that is widely used in candle making. It is popular because it is easy to melt, holds fragrance well, and works nicely with candle dyes. It is also affordable and easily available in many local and online markets.
For beginners, paraffin wax is often a practical option because it gives a smooth finish and does not require very complicated techniques. Whether you want to make plain candles, scented candles, or decorative candles, paraffin wax can be a good starting point.
Why Do Many People Choose Paraffin Wax?
There are several reasons why paraffin wax is commonly used in homemade candles:
It melts easily and is simple to work with.
It can hold both color and fragrance well.
It is budget-friendly compared to some other waxes.
It is suitable for both container candles and mould candles.
It is widely available in the market.
For someone just starting out, these advantages make the candle-making process much easier.
Materials You Need
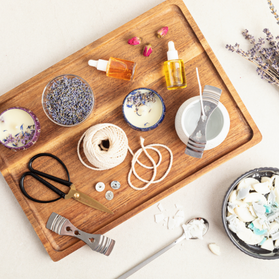
Before you begin, keep all the items ready in one place. This makes the process smoother and safer.
You will need:
- Paraffin wax
- Candle wick
- Wick holder or pencil
- Heat-safe container or mould
- Double boiler
- Thermometer
- Fragrance oil
- Candle dye, if needed
- Stirring spoon or wooden stick
- Wick sticker or glue
- Scissors
It is always better to use proper candle-making supplies rather than random household items, especially for fragrance, color, and wicks.
Step 1: Prepare Your Container
The first step is to choose a heat-safe container. A glass jar, ceramic cup, or metal tin can work well if it is designed to handle heat. Make sure the container is clean and completely dry.
Now place the wick in the center of the container. Use a wick sticker or a small amount of glue to fix the wick at the bottom. Once the wick is secured, hold the upper end with a pencil or wick holder across the top of the container. This helps keep the wick straight while you pour the wax.
A centered wick is very important because it helps the candle burn evenly.
Step 2: Measure the Wax
Take the amount of wax according to the size of your container. A simple method is to fill the container with wax flakes first, then double that quantity before melting. This is because wax volume reduces once it melts.
It is always helpful to keep a little extra wax, especially in case you need a second pour later.
Step 3: Melt the Paraffin Wax
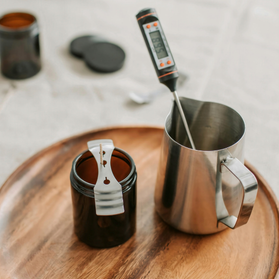
Paraffin wax should be melted using a double boiler. Do not melt it directly on the stove flame, because this can become unsafe and may overheat the wax.
Fill the lower pan with water and place the wax in the upper pan or pouring pot. Heat the water slowly and let the wax melt gradually. Stir it gently to help it melt evenly.
Using a thermometer is a good idea because proper temperature matters in candle making. Different paraffin wax products may have slightly different melting and pouring ranges, so checking the product instructions is always smart.
Step 4: Add Color if You Want
Once the wax has melted fully, you can add candle dye if you want a colored candle. Use only dye made for candle making, because other colors may not mix properly or may affect the candle’s burn quality.
Add a small amount first, stir well, and see the result. The melted wax may look darker than the final cooled candle, so avoid adding too much color too quickly.
If you like plain white or natural-looking candles, you can skip this step.
Step 5: Add Fragrance Oil
If you want a scented candle, now is the time to add fragrance oil. Stir it slowly into the melted wax so that it mixes properly.
Do not use too much fragrance oil. A very high amount can affect how the candle sets and burns. It is best to use the recommended percentage mentioned for your wax type.
A gentle, balanced fragrance usually gives a better result than an overly strong scent.
Step 6: Pour the Wax Into the Container
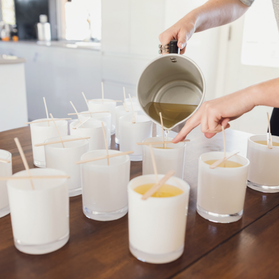
Carefully pour the melted wax into your prepared container. Pour slowly and steadily to reduce air bubbles and avoid spills. Keep the wick straight during the process.
Leave a little space at the top of the container instead of filling it completely. This gives the candle a neat and finished look.
After pouring, check once again that the wick is still centered.
Step 7: Let the Candle Cool Naturally
Now allow the candle to cool at room temperature. Do not move it too much while it is setting. Rapid cooling can sometimes cause cracks or an uneven surface.
In many cases, paraffin wax may develop a small dip or sinkhole near the wick as it cools. This is normal. If that happens, you can melt a little extra wax and pour a thin top layer to make the surface smooth.
Patience is important here. A candle that cools properly usually looks better and performs better.
Step 8: Trim the Wick
Once the candle has fully set, trim the wick to about one-fourth of an inch. This is a good wick length for a clean burn.
If the wick is too long, the flame may become too large and produce smoke. If it is too short, lighting the candle may become difficult.
Wick trimming is a small step, but it makes a big difference.
Step 9: Test the Candle
Your candle is now ready, but testing it is a very useful final step. Light the candle and observe how it burns. Check whether the flame is stable, whether the wax melts evenly, and whether the fragrance feels balanced.
Testing becomes even more important if you plan to make candles for gifts, events, or selling.
Homemade candles often improve with practice, so do not worry if your first one is not perfect.
Useful Tips for Better Results
Candle making becomes easier when you pay attention to small details. Here are some practical tips:
Always use a thermometer while melting wax.
Keep the wick centered from start to finish.
Do not overheat the wax.
Use only heat-safe containers.
Let the candle cool slowly at room temperature.
Trim the wick before every use.
Test one candle before making a bigger batch.
These simple habits can save both time and materials.
Important Safety Tips
Even though candle making is simple, hot wax must be handled carefully. Follow these safety points every time:
Never leave melting wax unattended.
Do not heat wax directly over flame.
Keep children and pets away from the work area.
Use clean and dry tools only.
Work in a space with proper ventilation.
Handle hot containers carefully.
Keep a cloth and basic safety items nearby.
Being careful during the process is just as important as getting a good final result.
Common Mistakes Beginners Make
Many people face small issues when they first start making candles. Some common mistakes include:
Using the wrong wick size, which can cause poor burning.
Adding too much fragrance oil.
Pouring wax too quickly.
Overheating the wax.
Moving the candle while it is cooling.
Not allowing enough setting time.
The good part is that most of these mistakes are easy to fix with a little practice.
Can Candle Making Become a Small Business?
Yes, many people start candle making as a hobby and later turn it into a home-based business. Handmade candles are popular for gifts, festivals, home decoration, and special occasions.
If you enjoy the process, you can slowly experiment with different colors, fragrances, jars, and packaging styles. Over time, you may be able to create a product line that looks attractive and useful for buyers.
Still, it is best to first learn the basics well and focus on quality before thinking about selling.
In short
Learning how to make a candle with paraffin wax is not difficult when you follow the right steps. It is a beginner-friendly activity that allows you to create something useful and beautiful with simple materials. Paraffin wax is often a practical choice because it is easy to handle, affordable, and suitable for many candle styles.
Start with one simple candle and keep your process neat and safe. As you gain confidence, you can try scented candles, colored candles, gift candles, or festive designs. Candle making becomes more enjoyable with each attempt, and the results often improve quickly.
A homemade candle may look small, but the satisfaction of making it yourself is truly special.
Frequently Asked Questions
Is paraffin wax good for making candles?
Yes, paraffin wax is widely used in candle making because it melts easily, works well with fragrance and color, and is suitable for beginners.
Can I make scented candles with paraffin wax?
Yes, paraffin wax can hold fragrance well, which makes it a popular choice for scented candles.
Why did my candle sink in the middle?
This usually happens because the wax contracts as it cools. A second small pour can help smooth the top surface.
How long should I let the candle cool?
Cooling time depends on the size of the container, but it is best to let it cool fully at room temperature without disturbing it.
What kind of container should I use?
Use a clean, dry, and heat-safe container such as a candle jar, metal tin, or other container made for candle use.